oilcloth apron bonnet
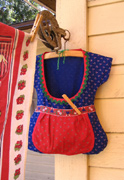
i got this idea way back when i pulled out this apron bonnet (which i did have on inside out, but since then i’ve finally figured out how to wear an apron bonnet). i got to thinking about bonnets, and rain bonnets (remember those clear plastic ones you could buy in the gumball machines for a quarter?) and apron-bonnets, and wouldn’t a waterproof oilcloth apron bonnet be useful for working in the yard when it’s drizzling, or for collecting muddy stuff from the garden. then you can just hose it off!
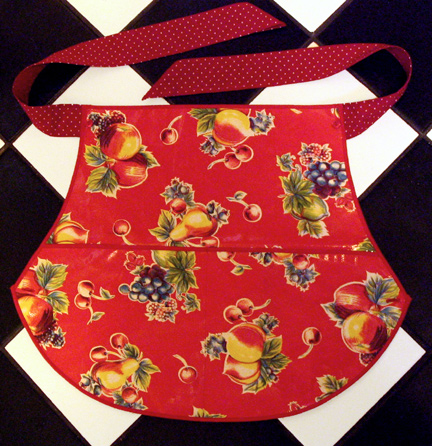
we’ve been getting a ton of rain here this week, with more still on the way. i thought it would be a good time to make an oilcloth apron bonnet.

i was too wimpy to actually go outside to take the picture, it’s really pouring out! by the kitchen window was close enough for me!
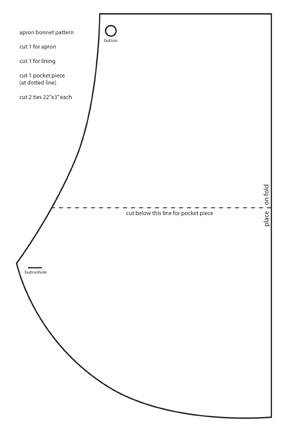
i copied the pattern from the original apron bonnet. click on the picture to download the actual size pattern.
make sure to print it out actual size (100%) it should print out on multiple pieces of paper that you will need to tape together
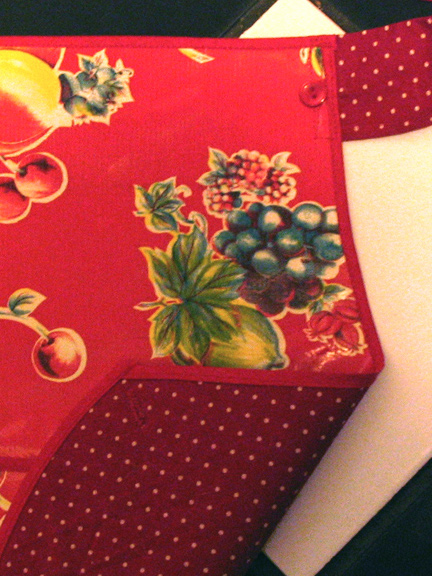
i lined it with polkadot fabric because the back of the oilcloth was kind of scratchy and not very pretty, but the original cloth apron was only one layer plus the pocket.
you will need:
2 1/2 yards of 1/4″ double fold bias binding
1/2 yard of oilcloth
1/2 – 3/4 yard fabric for lining and ties-it depends on how wide your fabric is. if your fabric is over 44″ wide, 1/2 yard is enough
thread
2 buttons
i highly recommend using a teflon foot for sewing oilcloth, it’s a zillion times easier.
1) cut pieces. place lining and apron together (wrong sides together) stitch around edge, 1/8″ from edge so stitching will be covered up by the binding.
2) sew bias binding to top edge of apron pocket. place pocket on top of apron and stitch around sides and bottom (1/8″ again) and stitch up the center to divide into 2 pockets. to find the center i folded the pocket in half and made a crease before stitching on to apron, then i stitched along the crease.
3) sew bias binding all the way around the apron.
4) hem ties (1/2″ seam allowance) turn edge under 1/4″, then 1/4″ again then stitch to make a nice clean hem. to make them triangular at the end like i did, fold one corner over to the edge and tack.
5) attach ties to sides of apron top.
6) sew on the buttons and make button holes.
to make it into a bonnet, slip the buttonhole over the button and fold the extra material up into the bonnet where your ear would be. use the pocket edge as a guide where to fold to make it nice and neat. the oilcloth holds the shape really well. see, i finally figured it out!
















January 20th, 2010 at 8:16 pm
inspired, i wonder if i could scale it down for little girls?
January 21st, 2010 at 7:30 am
Cute, cute!! I blogged your tutorial on Craft Gossip Sewing :http://sewing.craftgossip.com/free-pattern-oilcloth-apron-and-rain-bonnet/2010/01/21/
–Annew
January 21st, 2010 at 9:28 am
Where do I buy a teflon foot? I have been looking and looking. I don’t want to buy on line when the shipping will be more then the teflon foot.
January 21st, 2010 at 1:40 pm
i think it would be really easy to size it down for girls.
i bought my teflon foot at a repair shop that specialized in industrial sewing machines. they had so many different kinds of feet for different applications. but even if you have to order it in the mail, it will totally be worth it. i did read a few sewing tips that say you can put scotch tape on the bottom of your regular foot and that will help it glide over plastic and vinyl. that might be worth a try for a small project like this.
January 21st, 2010 at 3:54 pm
super cute!
January 22nd, 2010 at 6:57 am
What a great idea! I love seeing the versatility of oilcloth displayed in all its glory! Thanks!
January 22nd, 2010 at 8:43 am
Mary–If you have a Hancock’s near you they carry Teflon feet. Good luck. I just love this Apron Bonnet !!! Going to buy oil cloth today.
I work with Seniors that have dementia and they would love this !!!
Thanks
January 23rd, 2010 at 7:56 am
Any chance oilcloth bonnets will be appearing in your etsy shop???
January 23rd, 2010 at 2:32 pm
no, i won’t be making any to sell, i just wanted to make one!
March 14th, 2010 at 1:20 pm
Hi
I’m having a hard time downloading the pattern. It will only print the top half of the pattern. What am I doing wrong? The pattern is adorable! Thanks………Sue
March 18th, 2010 at 6:06 pm
hi sue! the actual size of the pattern is bigger than 8.5 x11, if your printer won’t print it out multi-page, you can try opening it in a program like illustrator or photoshop and printing it out from there, or you can print it out 1/2 size (so it will fit on one page) and enlarge it on a xerox machine. i hope that helps!
August 23rd, 2011 at 8:52 am
Try putting scotch tape on the bottom of the sewing machine foot to help your regular foot glide better.
August 23rd, 2011 at 8:53 am
Was wondering how to add a zipper to the pocket to make it usage while wearing the bonnet…
November 17th, 2011 at 10:58 am
I am currently making this apron. What I can’t figure out is how you got the front of the apron on the top. It seems like if you fold the top up to button it, you would have the back side of the apron on top. Am I doing something wrong?
November 18th, 2011 at 3:01 pm
ah, that’s what i did here http://madewithlovebyhannah.com/WordPress/?p=93 and then i finally figured out how it works…you don’t fold it together to button like you would normally think. when it’s face up, you slide the button hole corner over the button (without folding it right sides together) keeping the oilcloth side up on both the button hole corner and the button corner. then you can arrange the extra material inside the bonnet. hope that helps!
November 18th, 2011 at 8:47 pm
Thanks! I think I understand now.
June 23rd, 2012 at 8:12 pm
Hi! it’s really hot where i am right now, and i was wondering if i used a lighter fabric with interfacing do you think it would make a nice sun bonnet?
June 24th, 2012 at 10:10 pm
yes, it would! the original apron bonnet that i made the pattern from was made from lightweight fabric. it did not have any interfacing and it was just a tiny bit floppy, so you could probably go with an interfacing that is lightweight as well.
April 10th, 2013 at 2:58 pm
really cute but too small for any one in my family we must have really big heads cause i’m not able to make it fit like your picture, Also they have a new Iron on vinyl by heat n bond i used it on a batik so one layer of fabric with vinyl ironed on and serged around it added ties , turned out supper fast and easy, but again the size is way to small more for a small child.
April 10th, 2013 at 8:54 pm
hi kaiti, make sure you printed it out actual size. do not shrink it to fit on one sheet of paper, it needs to be printed at 100%. it should print out on multiple pieces of paper that you will need to tape together.
May 29th, 2013 at 5:19 pm
I love this! I’ve been looking for it for a few months now…I had it a few years ago…So Thank You! I get to go be a pioneer this summer and this will be fabulous to wear!